Have you ever wondered how to screen print? Or even what screen printing is in the first place? Well, this is the right article to read. To begin the process you will need specific supplies. You can find bundles of these items together at certain stores like Micheals, Target, Walmart etc. If you would like to go the traditional route with buying supplies, then you will need to start off with getting mesh screens. These can be purchased through an art store or online.
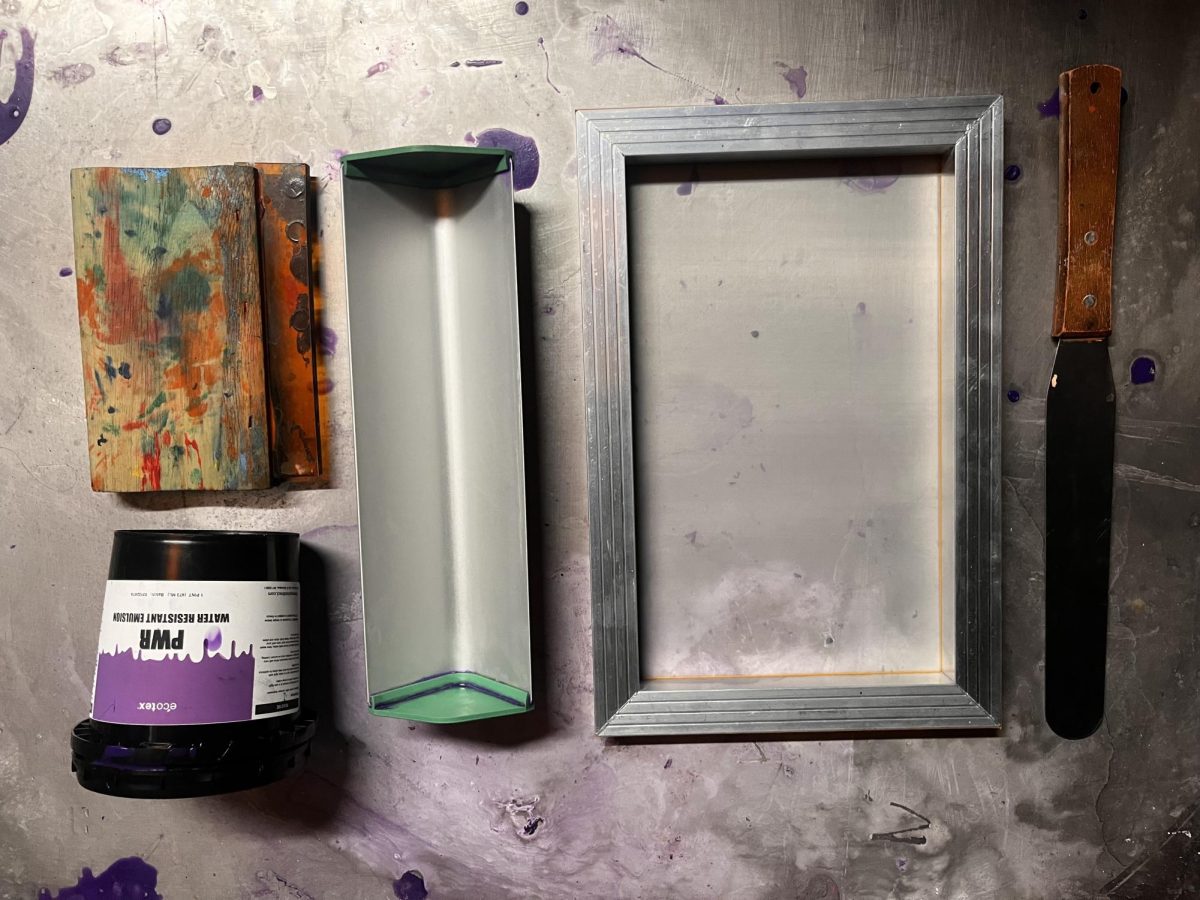
Another good option is making the screen yourself, but it can be tricky without the right tools. After you have your mesh screen, you will need a screen printing emulsion. This is going to evenly coat your screen, allowing you to burn the desired image.
When buying, pay attention to if the screen has something called a sensitiser solution already in it. Without the sensitizer solution, the emulsion won’t react to the light correctly, resulting in a failed attempt. To prevent this, buy emulsion with a sensitizer already added or buy it on the side and add it directly into your emulsion and mix it until well incorporated. Make sure you do everything in a light safe room (dim lights), or you’ll risk exposing your emulsion before using it.
In order to coat your screen cleanly, I’d recommend buying a scoop coater so you can get a nice even coat of emulsion onto your screen. Another great tool is a metal spatula, you can use this to pick up and scrape excess emulsion or ink from your screen, also buy a squeegee.
Now you will want to purchase your desired ink colors make sure you are buying screen printing ink water based or plastisol based. With all the most important parts out of the way, in order to burn your picked images you must have an inkjet printer that is able to print on transparency paper. This allows the printer to put ink onto clear sheets of paper which you put onto your dried emulsion screen.
Now if you don’t have an inkjet printer and you don’t want to buy one, no worries! You can head to a local staples and they can print your desired image, you just have to pay a small print fee. You will of course need clothing of choice. This can be really any fabric that your heart desires, even wood, but you may need to research and purchase different ink types.
So now you’ve burned a huge hole into your pocket and you want to begin this process. Great! To start, you will need to grab your screen which you will need to degrease by rinsing off in water and drying. Then, after mixing your sensitizer into the emulsion, pour a generous amount of emulsion into the scoop coater. From here tilt the screen at a 45 degree angle and allow the scoop coater to slowly but evenly apply the emulsion to both sides of your screen.
You want to allow the screen to fully dry in the dark before moving onto any other step. This can take up to 24-48 hours but the process can be sped up drastically with a fan. And remember, no light allowed! This can ruin your screen before you even have the chance to begin.

Now that you have a dried screen, you can begin the burning process that starts off with your printed image on the transparency paper. I’d recommend getting two of the same images so you can overlap them to make a darker image. Remember, the goal is to block out the light in our image so you can wash out the unexposed part. Tape the image onto the flush side of the screen, and make sure the image is inverted when taping down because it will show up wrong if not.
You will then need to place your image outside in direct sunlight. The time you leave it in the light all depends on what emulsion you are using, some are quicker, some are slower. Look up the brand you are using and try to find an exposure time chart.
After letting your emulsion screen with your taped image sit in the light, take it to a sink to wash out the image. This may take a while so be patient, you will want to let the water soak into the screen while slowly and carefully scrubbing out the image eventually revealing the old screen prior to the emulsion. This effect will only be over the dark parts in your image.
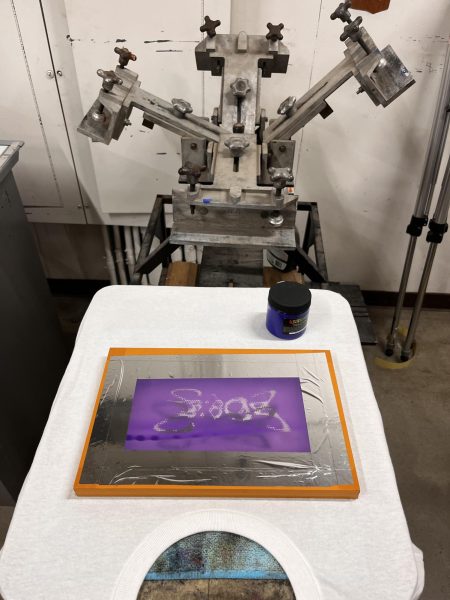
Now you have this screen, let it fully dry and prepare your clothing of choice. I’d recommend cutting some cardboard and putting it inside the shirt to stretch the fabric. This allows an even print with more control of where the print area is. Now that the clothing is ready for printing, you can grab the screen printing ink of choice and a squeegee. Apply the ink onto the screen and flood the image evenly with the ink so you don’t get any splotches. Carefully set down the screen to where you want the image to be on the clothes, then take your squeegee and evenly go up and down the screen using a 45 degree angle pushing all the ink through the mesh screen onto the clothes.
After printing, take the spatula and scrape any excess ink from the screen and put it back into the jar. So now you have this amazing custom item, but you still need to get something that produces heat (like a heat gun or a hair dryer) and dry the wet ink until it is completely dry. This acts as a cure for the ink setting it into the fibers of the clothes increasing the longevity of the ink.
Now that you are finished, make sure to clean up all the ink and don’t allow it to dry, especially if you are inking in the sun. You must work fast in order to prevent ink from drying into your mesh screen. This can completely ruin a screen, never letting you print with it again, which is a huge pain after all that hard work.
If after some time you want to reclaim some old screen you can also purchase an emulsion remover and scrub away at it in a sink to get a screen back to square one.
Thank you for reading and I hope you experiment yourself with screenprinting and see what you can make.


